Help - DIY
The Help & How To guide for MX-5 Do It Yourself

Mk.1 - Air Intake Grill
To download template file 'Click' on file format required
'AutoCAD - DWG' or 'AutoCAD - DXF' or
ZIPPED
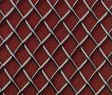
You will require a sheet of competition mesh 900mm x 300mm Carnoisseur - Part no: 301 6064 @ £21.95) this will make 2 grills, or a sheet of mesh with a minimum size of 700mm x 132mm. The mesh should not be so small as to reduce the air flow to the engine thus causing overheating problems and reduced engine performance. The grill should fit all MK1. MX-5's with or without tie-down hooks, and also if you have spot/fog lamps fitted. (With the hooks fitted you will have to make some extra cuts at each end of the grill.
Stainless Steel woven wire Mesh Links:
http://www.passionmotorsport.co.uk/RGM19.htm
http://www.halfords.com + Bodywork Trim
Mk.2 - Air Intake Grill
No download template is currently available
You will require a sheet of competition mesh 900mm x 300mm Carnoisseur - Part no: 301 6064 @ £21.95) this will make 2 grills, or a sheet of mesh with a minimum size of ???mm x ???mm. The mesh should not be so small as to reduce the air flow to the engine thus causing overheating problems and reduced engine performance. The grill should fit all MK1. MX-5's with or without tie-down hooks, and also if you have spot/fog lamps fitted. (With the hooks fitted you will have to make some extra cuts at each end of the grill.
Stainless Steel woven wire Mesh Links:
http://www.passionmotorsport.co.uk/RGM19.htm
http://www.halfords.com + Bodywork Trim
Mk.3 - Air Intake Grill
To download template file 'Click' on file format required
'AutoCAD
- DWG' or 'AutoCAD - DXF' or
ZIPPED
You will require a sheet of competition mesh 900mm x 300mm Carnoisseur - Part no: 301 6064 @ £21.95) this will make 2 grills, or a sheet of mesh with a minimum size of 750mm x 132mm. The mesh should not be so small as to reduce the air flow to the engine thus causing overheating problems and reduced engine performance. The grill should fit all MK1. MX-5's with or without tie-down hooks, and also if you have spot/fog lamps fitted. (With the hooks fitted you will have to make some extra cuts at each end of the grill.
Stainless Steel woven wire Mesh Links:
http://www.passionmotorsport.co.uk/RGM19.htm
http://www.halfords.com + Bodywork Trim
Mk.1 - Fog/Spot Lights
Lamps shown are Ring - Illuminator 2 fog lamps
Fitting Spot/Fog Lights - You will require the following items:
Fit the relay to the left hand side of the engine bay, (on the bonnet support securing clip bracket) there should be a threaded hole (5mm dia.). This is used for the official Mazda fog lamp relay. Feed 1 thin wire through the bulkhead, this feeds the relay coil from the On/Off Switch. The 12Volt supply needs to come from a supply isolated by the ignition switch (I wired mine from the dim/dip relay supply). The supply for the lights comes from the fuse box (L/H side rear of engine bay) via the relay. The 2 lamps are then connected in parallel to the relay (normally open contacts). See diagram below.
 |
Fog-light
Wiring Diagram.
Mk.1 - Fitting Air Horns
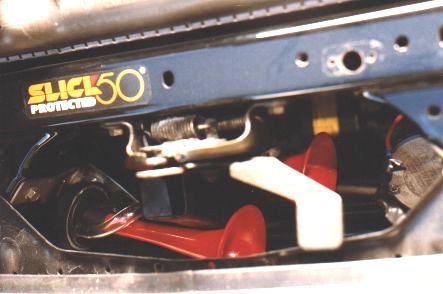
Location of Air Horns
The diagram below shows the dimensions for a suitable bracket needed to hold the air horns if one is not supplied. The short length bolts to the drivers side original horn bracket. The compressor bolts to the passenger side and connects to the original horn supply wires. The original 'STOP 10A' fuse has to be upgraded to 20Amps. This is because the original fuse will blow if you sound the air horns and apply the brakes at the same time. When installing my air horns I connected both existing horn wires together to reduces the chance of wire failure due to the high current needed by the compressor. I also fitted a 15Amp in-line fuse as extra protection, this is not essential but I would recommend it because if the compressor fails, the 15Amp fuse blows before the upgraded 20Amp 'STOP' fuse so the rear brake lights will still work.
 |
Diagram of Air Horn Bracket
Mk.1 Side Lights instead of Dim/Dip.?
Location of Air Horns
Disconnect Dim/Dip relay connector (Connector wire colours - White/White&Blue/Black&Yellow/Red&White) or as I have done, cut the small black and yellow wire feeding the rear left hand side relay and insert a small switch in line so that the Dim/Dip System can be re-activated if required. As this wire is isolated by the ignition switch I also connected the feed to my fog lamp switch from the positive side of the switch.
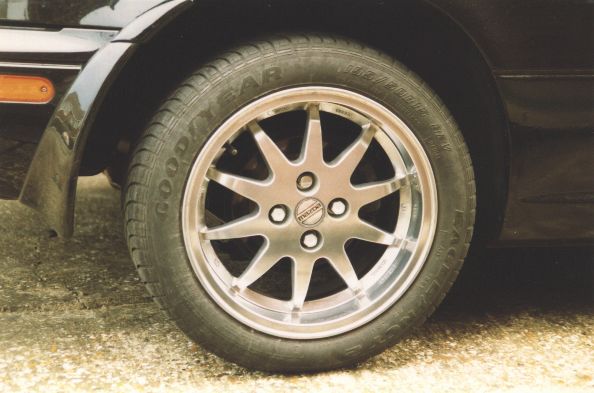
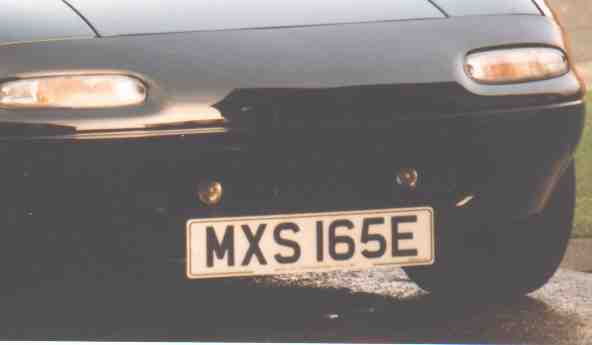
Mk.1 - Number Plate Brackets
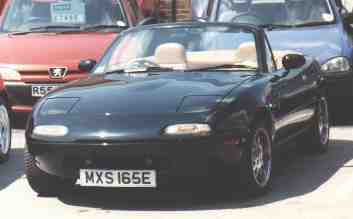
As fitted to car in the above picture
If you don't want the standard Mazda Number Plate Holder and not a stick-on one, then this is one option you could choose. The bracket's are made from thin polished stainless steel sheet.
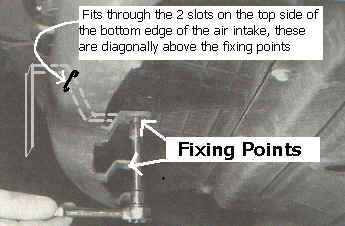
The brackets fit through the 2 small slots on the top side of the bottom edge of the air in-take, which are positioned between the 3 flat Triangle shaped fixings. They are then secured to the bottom front edge of the bumper and engine cover as shown in photo below. The number plate itself is fixed to the brackets with number plate fixing bolts, or some adhesive mounting brackets. The ones used on the car shown were from SIGNAM Ltd. part number H 423913 (Available from Halfords)
 |
|
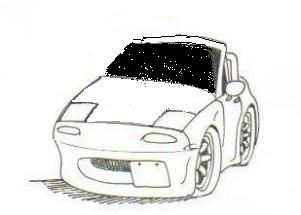
This is another idea for fitting a front number plate. Some Japanese Sports Cars have their registration plate fitted on the Front passenger side, to the right of the Front Air Intake. The bracket is made from 1/8" polished aluminium sheet. Size 260mm x 80mm.
The bracket is secured to the passenger side 'Tie-Down' hook then manually adjusted so that it is parallel with the ground and the front of the car. The number plate needs to be the standard sized 2 line type. The number plate itself is fixed to the brackets with number plate fixing bolts, or some adhesive mounting brackets (as above) which are then bolted through the main number plate bracket.
To download template file 'Click' on file format required.
'AutoCAD - DWG' or 'AutoCAD - DXF' or ZIPPED
How 2 Stripe Your MX-5


| Large bucket Good scissors Sharp Craft Knife or Razor Blade Good Quality Soft Sponge Dishwashing Liquid or Baby Shampoo |
Masking
Tape Hair-dryer NOT a 'hot air' gun !!! Credit Card - not just to pay for the stripes :-) 2nd pair of hands /help |
Ideal Conditions:
Warmer than an air temperature of 23ºC (75ºF). Any cooler
can make the vinyl less capable of stretching if or when necessary.
Apply the stripes in a dry environment.
Most important - Clear the working area of any dust. If you're not working in
a garage or enclosed space keep well out of the Wind. If there is any wind,
any dust will be sure to find its way on the sticky side of the vinyl or the
surface of the car.
Other tips:
Be patient it could take a whole day to apply the stripe to the entire car.
Make sure you have plenty of material available to stripe the entire length of the car
at least twice and add some more. Include enough for a hardtop, even if you
haven't got one. (Better to much than be left 1" to short.)
Very important
When filling your large bucket with water add a few (2-3) small drops of dishwashing
liquid. Do not make it too soapy! as this will not allow the stripe to dry properly to the
surface of the vehicle. Only a few soapy bubbles should be visible on the
surface.
Test Procedure - Cut a small piece of vinyl a few inches in length. The general application process for the vinyl stripe material is to have the surface of the car extremely
wet as should the vinyl. Using your sponge soak a section of your MX-5 with the soapy solution. Some people use a spray bottle to put the mixture on both the car and the vinyl.
(Spraying both sides of the vinyl and the paint work) Also dip the piece of vinyl into the bucket to set the surface. Remove the backing from the vinyl and apply the vinyl to the surface of the car. The vinyl should be able to
easily slide around on the surface . Once satisfied with the positioning, take a
straight-edged surface such as your credit card and gently wipe the surface of the vinyl in an upward diagonal fashion
(away from you). This should remove all the water and any air from under the surface.
Don't press down to hard with the edge that it digs into the vinyl.
Now with your dryer on low-heat, begin to apply heat to the vinyl whilst simultaneously using your wet sponge or fingers to smooth out any water or air bubbles
still underneath the vinyl. If you find any dirt or dust particles still underneath the vinyl Don't
panic! You can still lift the vinyl, wipe away the dirt with your wet sponge
then repeat the above procedure.
SAFETY WARNING - 'RISK OF ELECTRIC SHOCK' OR 'DEATH' as ELECTRICS AND WATER DON'T MIX. Find someone with dry hand to help apply the heat.
Step 1
- Wash your car well to remove all traces of road dirt, flies and bugs
etc. I also found that it is recommend that if you apply a thin layer of wax,
this can help the removal of the vinyl in the future should you ever need to replace a piece or remove it altogether.
Bonnet Application
Step 2:
With help, apply a long piece of masking tape equal distance from both sides the
full length of the bonnet. If you are have a single stripe this will be the
center line, so you may need to work out an offset measurement for the edge
guide. If you are having 2 stripes, this will also be the center line but also
the gap between the 2 stripes. This MUST be straight!
Step 3:
Un-Roll the vinyl across the length of the car to get the rough lengths
required. Cut the vinyl with a good few inches extra. This extra will be used to wrap around the edge of the hood.
Step 4:
Soak the hood of the car with the soapy solution. Now soak the section of stripe you just cut before removing the backing. With
help, remove the backing of the ' Controltac' vinyl and place gently on the hood of the car.
DO NOT crease or fold the vinyl. It is very thin and susceptible to creases.
If you're patient when removing the backing, this can be avoided. The vinyl
may well apply with wrinkles, wrinkles and creases are not the same. The wrinkles will be smoothed out with the credit card.
Lay the soaking wet vinyl stripe on the left (or right) side of the tape matching the edge of the vinyl to the edge of the tape. This
should ensure a straight stripe and equal distance between the stripes. Once you are
happy with the positioning of the stripe, your 2nd pair of hands will need to holds down the stripe to keep it from moving,
while you wipe away the excess water from under the stripe with your credit card or sponge. When
most of the excess of the water is removed, begin to apply heat with the blow dryer while continuing to work the bubbles from underneath the vinyl.
When you are satisfied with the final position, (check the stripe positioning
from a distance, it's easier to see if it is off center) fold the excess stripe around the edge of the hood and apply heat to remove any water.
Important Note! - Do not continue to use a squeegee or credit card as
this will risk stretching and/or tearing the vinyl when heat is applied. The heat will soften the vinyl and soften the glue on the back. The
only best way to remove the bubbles from underneath the stripe is to use a soft wet surface such as your hand or sponge. It is very important that your fingers stay soaking wet.
Dry fingers will tend to pull on the heated vinyl. (Extreme example - soak a
sheet of A4 paper, now dry your hands before rubbing your fingers across the
surface. Now repeat with wet fingers)
Step 5:
Repeat Step 4 for the other side of the masking tape.
Front bumper application
Step 6:
Measure the length of the bumper with the vinyl and cut to the required length.
It will need to match up perfectly with the line of the bumper so that it sits just inside the rubber lining between the bumper and the
bonnet. Mark the center line with masking tape as before. Repeat the same procedure
as shown in Step 4. When applying the vinyl push it into the groove
which runs around the bumper. This may take quite some time to smooth
out with your wet finger and blow dryer. Mk.2 MX-5 (99+) will not have
this problem as the front bumper is smooth. Take your time also when applying the stripe to
under-portion of the bumper. This will also want to wrinkle and crease because of the curves of the
MX-5. As you apply heat, this becomes easier as the vinyl will be able to stretch and apply itself underneath the bumper.
Boot lid and rear bumper application
Step 7:
Using the same methods as above, use the masking tape as your guide down the middle of the rear
deck-lid and rear bumper. Repeat the steps above to ensure proper application.
Step 8:
The rear bumper panels. this final step of the stripe application can be a
bit of a nightmare. First there is the number plate section and then the rear
bumper, the curves at the bottom, makes each stripe bend inwards to meet at the
bottom of the bumper. There are two options. Do the bottom of the bumper with two pieces of vinyl instead of
one or, apply enough heat to the vinyl allowing you to stretch the vinyl enough that it maintains a straight line over the bumper. This is very difficult,
which is why this section is best done last. Too much heat will stretch and possibly tear the material. Try a few test
pieces to determine the amount of heat required. This is why you need more
than the minimum length required. If you have properly applied the top of the bumper, it should be drying while you work on the bottom portion. Gently pull down the stripe material in the direction away from the masking tape just enough to keep it straight. With the right amount of heat the material will stretch into position without a hitch. You can now
gently work out the air and water bubbles.
The Hard Top
Step 9:
The hard top. Follow the same procedure as for the bonnet. This step could be
done either first or last as the stripe/stripes could be lined up across the
full length of the car.
Step 10:
Allow at least 6 hours for the stripe material to dry and to allow its adhesive to stick to the surface properly.
Step 11:
Allow a few days before washing and waxing the car again.
|
Approx.
lengths required to stripe a MX-5 are: Stripe
thickness' Guide |
 |
A selection of compatible colours
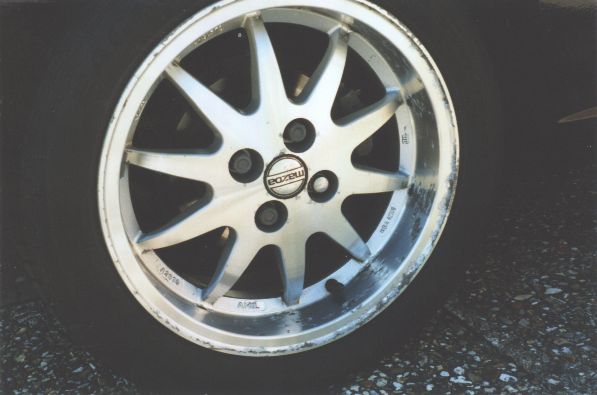
SE - Alloy Wheel Restoration
|
|||||||||||